Taking a Report with HWIT Integrated Reporting
Please note, if you are using MonitorQA or SafetyCulture you should refer to the guide here.
Before You Start
Section titled “Before You Start”Make sure you have:
- A report on your list for the property you’re visiting
- A network connection (or at least a recent sync — see Working Offline below)
- The Fundamentals Mobile app open
Starting the Inspection
Section titled “Starting the Inspection”- Open Fundamentals Mobile and go to the Reports screen.
- Find the report for the property you’re visiting. Upcoming reports are sorted by date.
- Tap the report to open it, then tap Open Report.
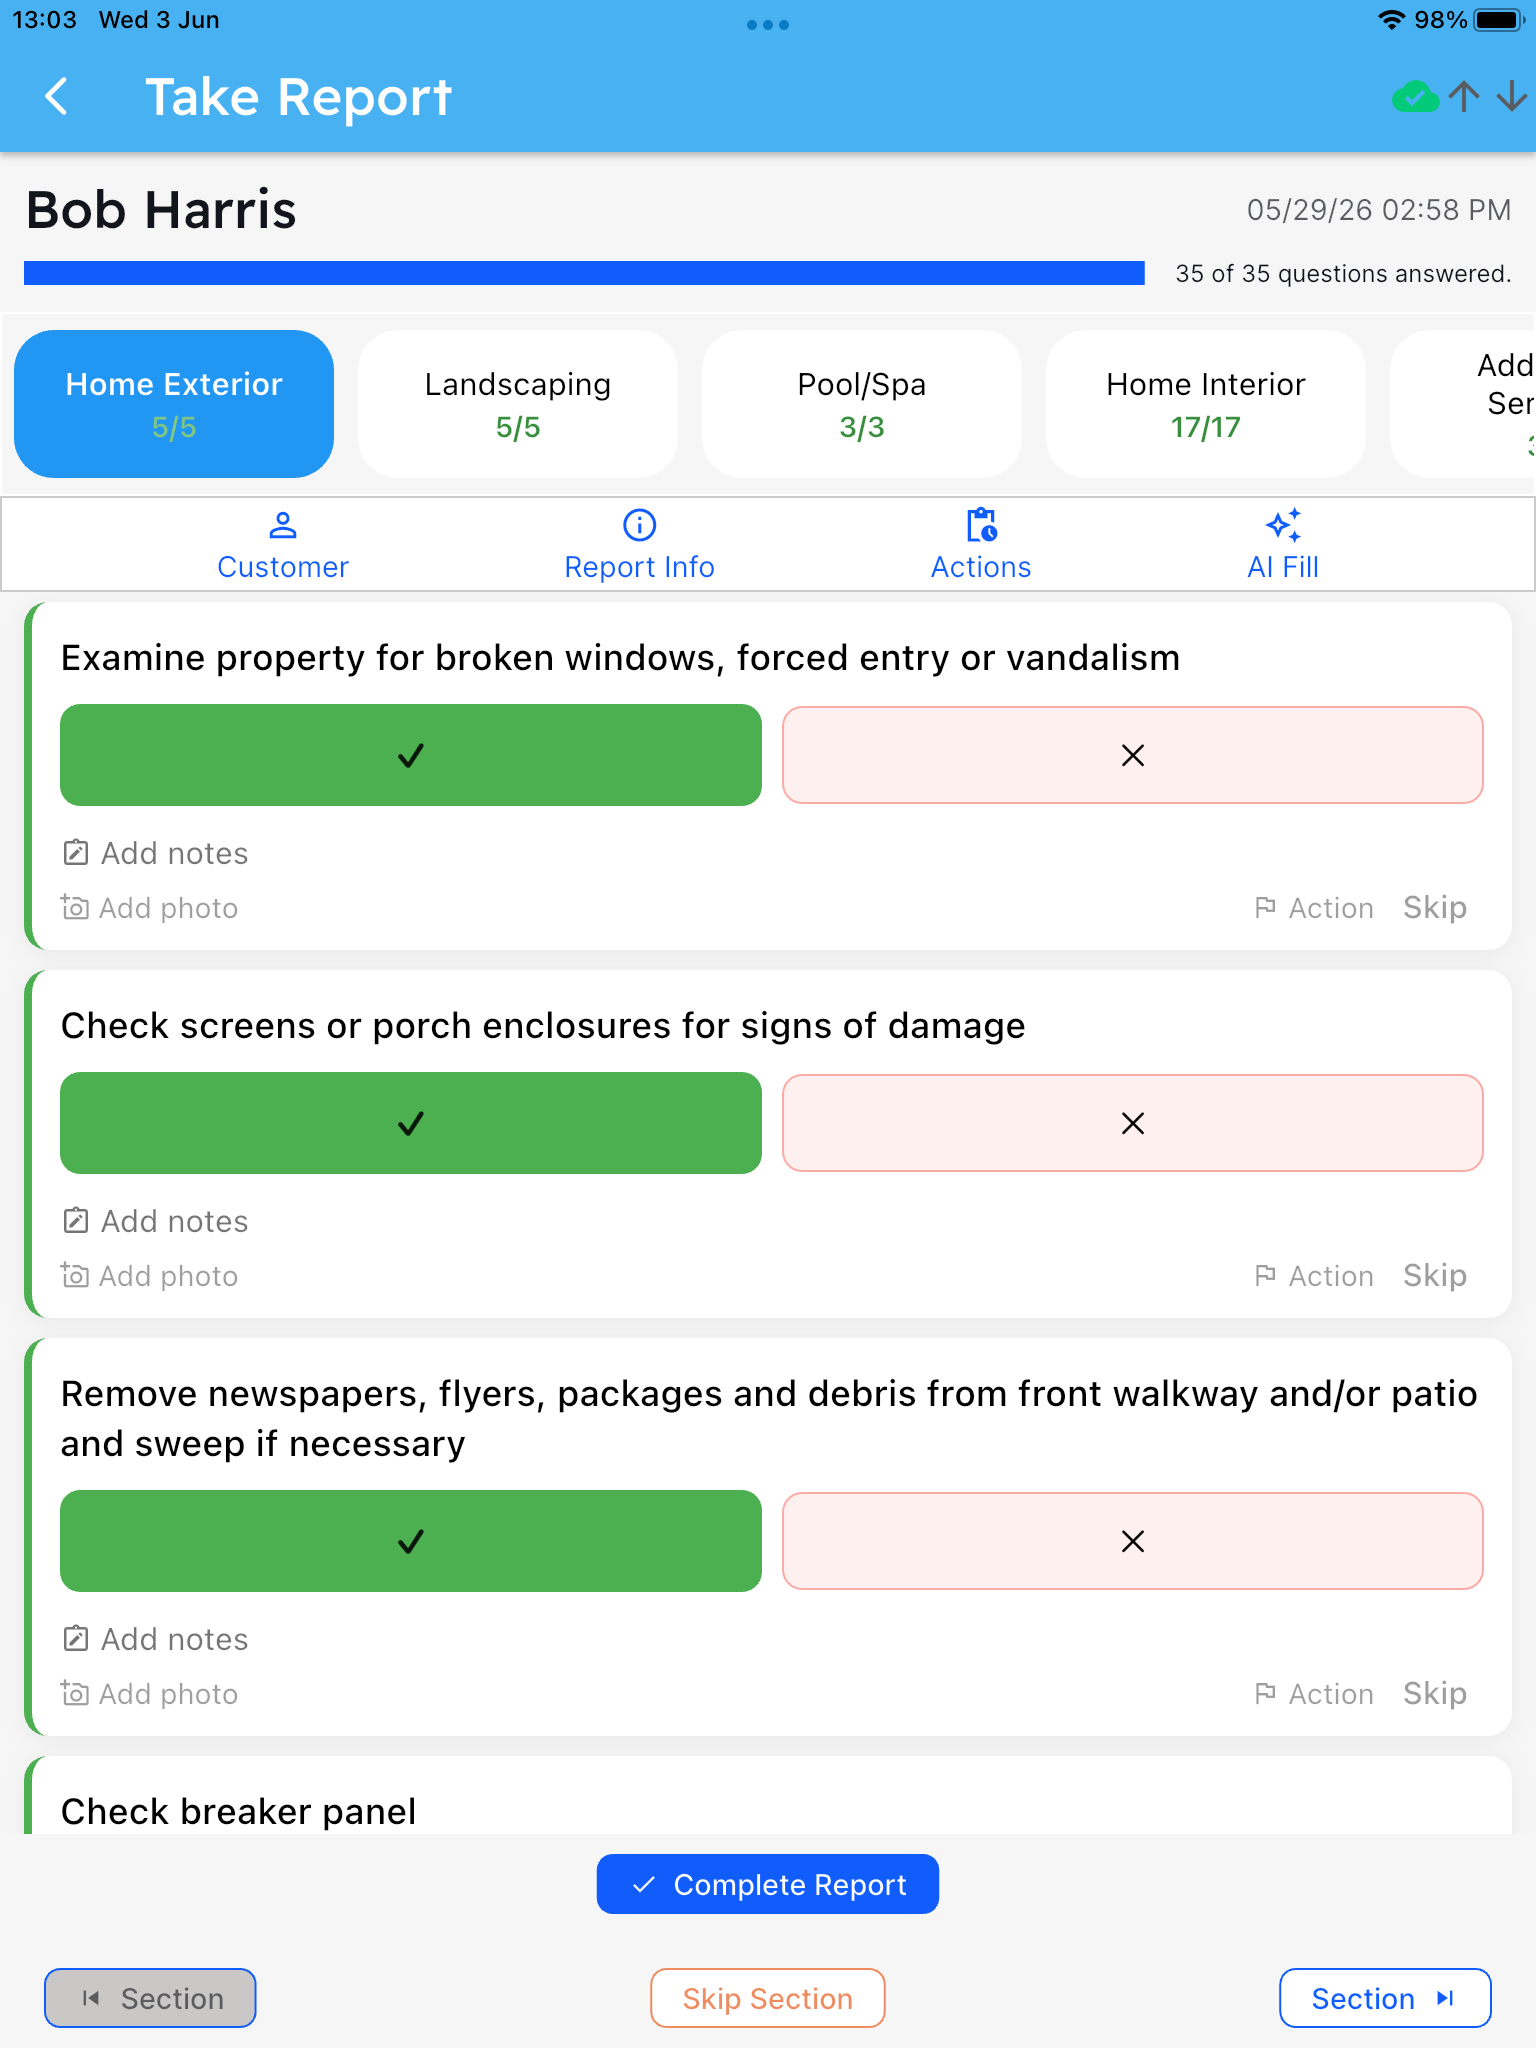
The inspection screen opens. You’ll see a row of section tabs across the top and the first question below.
Navigating Sections
Section titled “Navigating Sections”The section tabs at the top of the screen show every section in the template. The active section is highlighted. A small count shows your progress through each section — for example, 3/8 means you’ve answered 3 of the 8 questions in that section.
- Tap any tab to jump directly to that section.
- Use the Previous and Next buttons at the bottom to move between sections in order.
- When all questions in a section are answered, its count turns green.
Answering Questions
Section titled “Answering Questions”Each question card shows:
- The question text
- Response buttons or a text field depending on the question type
Tap your answer. For Yes/No, Pass/Fail, or multiple choice questions, just tap the button. For text questions, tap the field and type your response. Your answer is saved automatically the moment you tap — there is no Save button to press.
Adding Notes to a Question
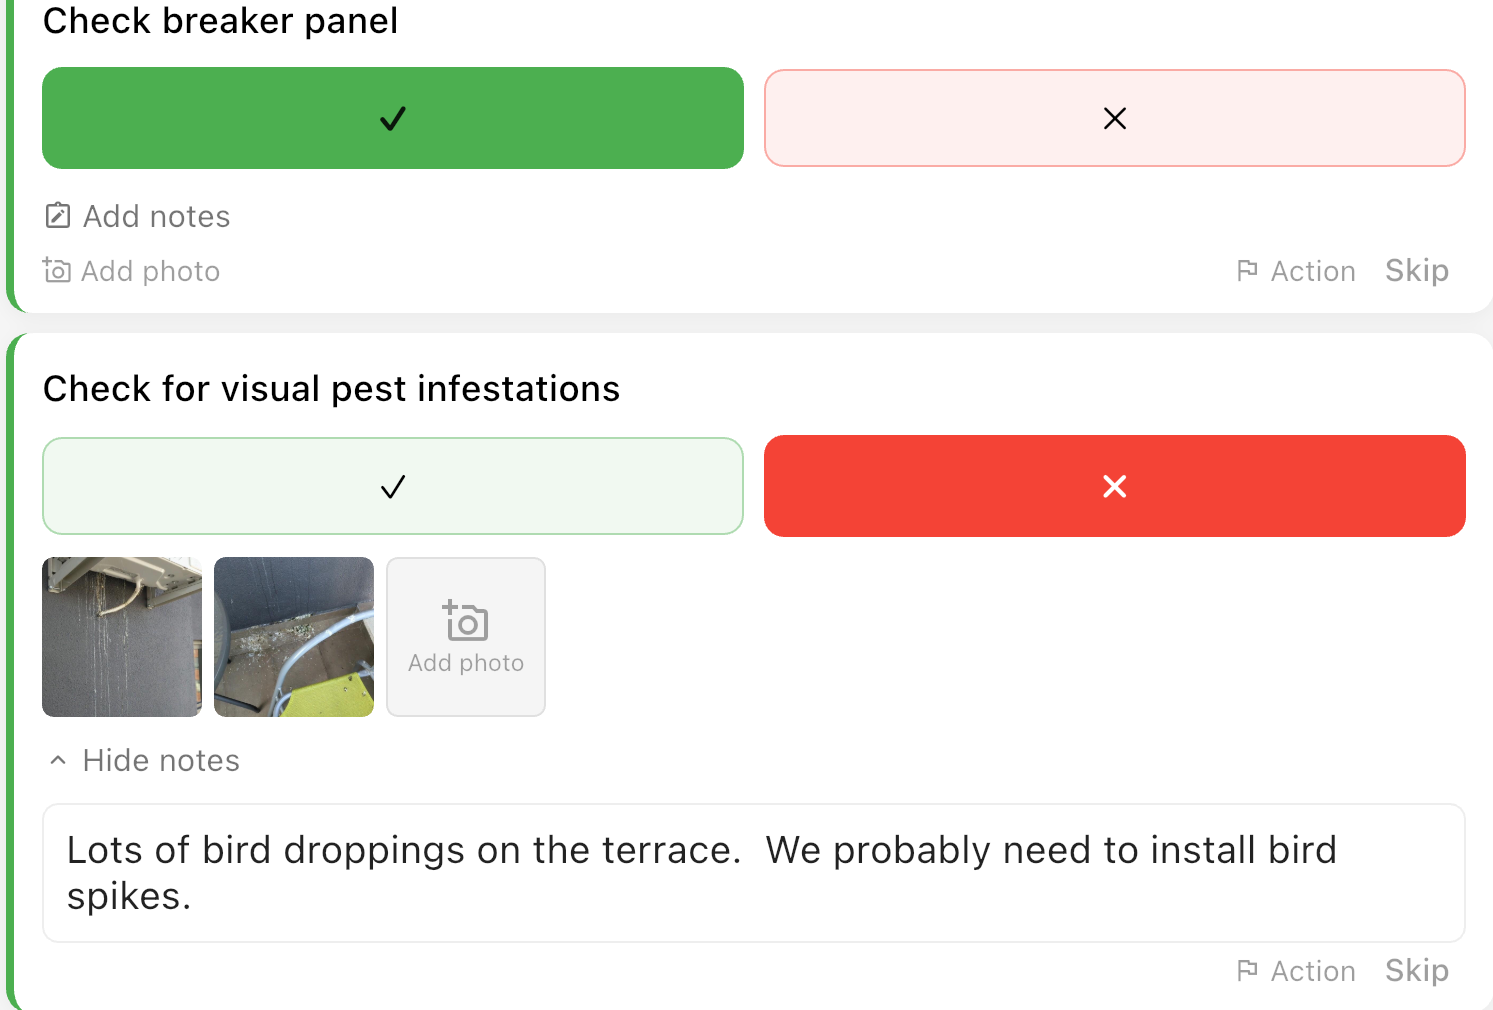
Section titled “Adding Notes to a Question”Every question has a notes field below the response buttons. Tap it to type additional observations — for example, details about a condition, what you found, or what action was taken.
Notes are included in the final report your client receives.
Taking Photos
Section titled “Taking Photos”Every question has an Add Photo button, with two options:
- Camera — opens a full-screen viewfinder right in the app. Tap the shutter to take a photo, then keep tapping to take as many as you need, one after another, without leaving the screen or tapping Add Photo again between shots. A thumbnail strip along the bottom shows every photo you have taken so far. Tap Done when finished to return to the question.
- Gallery — select multiple existing photos from your camera roll at once.
You can add multiple photos to a single question. Photos appear as thumbnails on the question card.
Tip: While the camera viewfinder is open, tap the flash icon to toggle the flashlight on — useful in dim basements, crawlspaces, or utility closets.
Photo limit: Up to 10 photos per question, and up to 100 photos per report total.
Working With a Photo
Section titled “Working With a Photo”Tap any photo thumbnail to open a menu with three options:
- View photo — opens the photo full-screen so you can see it clearly
- Annotate photo — opens the annotation editor (see below)
- Delete photo — removes the photo from the question
Annotating Photos
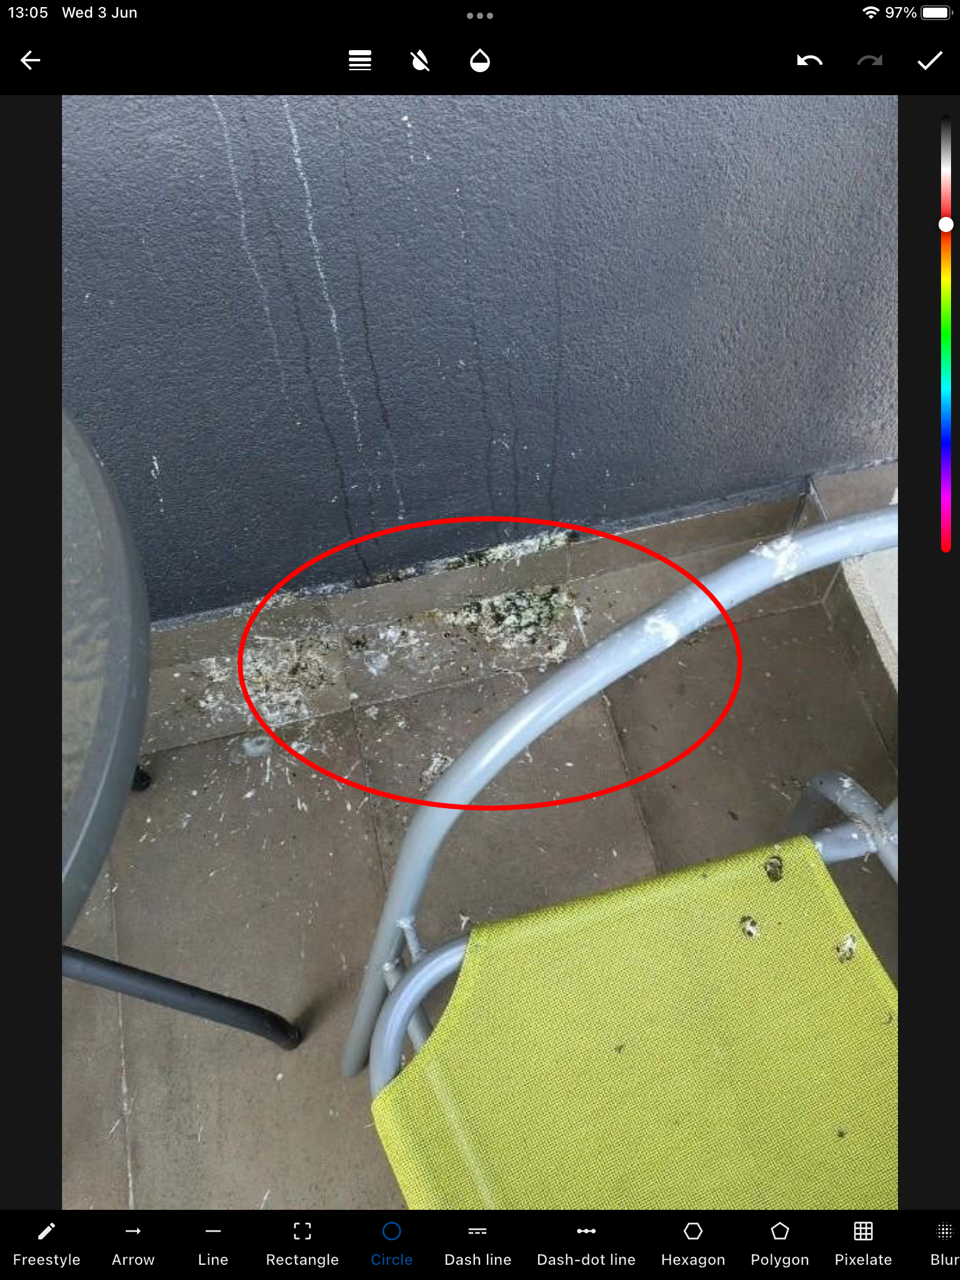
Section titled “Annotating Photos”The annotation editor lets you mark up a photo before it appears in the report — useful for highlighting a specific issue, circling a problem area, or adding a label.
To annotate a photo:
- Tap the photo thumbnail.
- Tap Annotate photo.
- Use the toolbar at the bottom to choose a tool:
- Paint — freehand lines, circles, rectangles and arrows
- Text — add a text label
- Crop / Rotate — crop the photo or straighten it
- When you’re done, tap the checkmark to save.
- Tap Discard if you want to cancel without saving.
Your annotated version replaces the original on the report. The annotation is saved to the report and uploaded automatically — it works offline the same way as regular photos.
Tip: The draw tool starts with a thin line. Use the slider that appears when the draw tool is active to make it thicker if needed.
Skipping a Section
Section titled “Skipping a Section”If an entire section doesn’t apply to this property on this visit — for example, the Pool section when the pool is closed for the season — you can skip the whole section:
- Tap the section tab to navigate to it.
- Tap Skip Section.
- The section tab shows a strikethrough to remind you it was skipped.
Skipped sections are clearly marked in the final report so the client knows they weren’t forgotten — just intentionally bypassed. To undo a skip, tap the strikethrough tab and tap Unskip Section.
Adding an Action
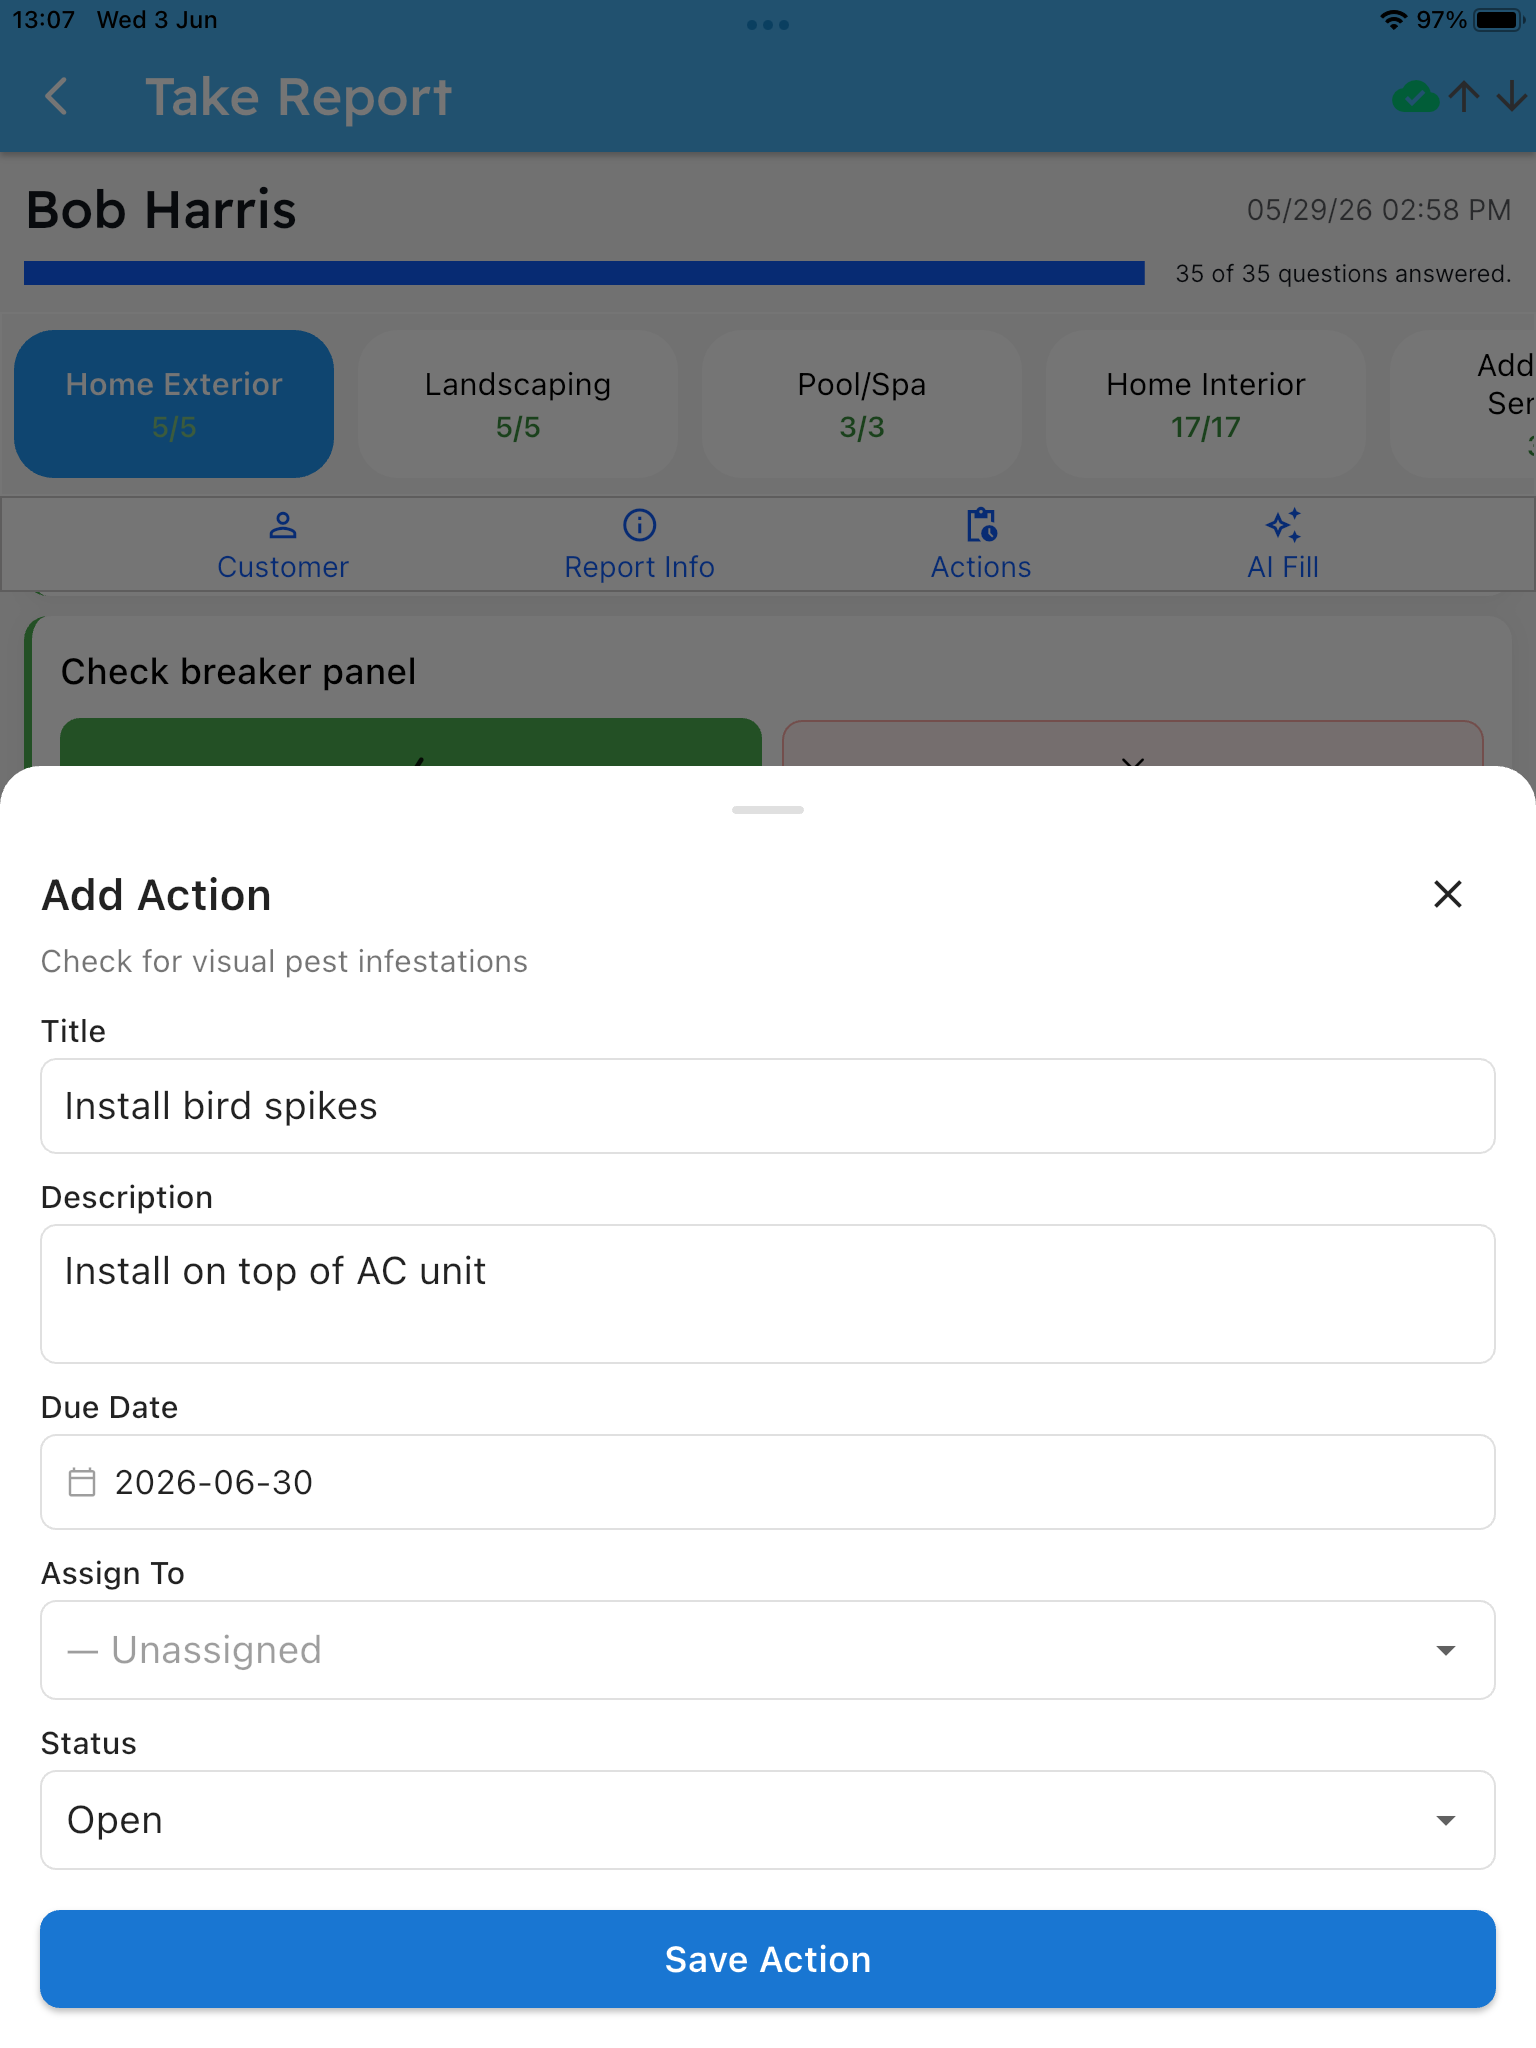
Section titled “Adding an Action”An action is a follow-up item you want to flag — something that needs attention beyond the inspection itself. For example: Replace A/C filter, Caulk master bath shower, Call plumber about slow drain.
To add an action to a specific question:
- Tap the Action button on the question card (shown with a flag icon).
- Fill in:
- Title — short description of the task
- Description — any additional detail (optional)
- Due Date — when it should be resolved (optional)
- Assign To — which team member should handle it (optional)
- Tap Save.
A badge on the question card shows how many actions are attached to that question. To edit or delete an existing action, tap the badge to open the action list, then tap the action.
Your office can also see and manage these actions from a computer. If an outside company needs to do the work — like a plumber or an AC company — your office can attach that vendor to the action. There’s even a button to turn it straight into a Task, so the visit gets scheduled without anyone having to type everything again.
Adding a Signature
Section titled “Adding a Signature”If the template requires a signature, a Sign Report button appears on the final section.
- Tap Sign Report.
2. Sign with your finger in the signature box.
3. Tap Accept.
The signature is included in the final report.
Completing the Report
Section titled “Completing the Report”When you’ve worked through all sections, tap Complete Report.
The app confirms completion. From this point, the system takes over automatically:
- Report link created — a short link is generated at homewatchit.report so the client can view the full report online.
- Email sent — the report is emailed to the client with the view link if you have that option enabled.
- Billing item created — a billing item is added to the client’s account based on the visit rate.
- Photos finalized — if any photos are still uploading, the system waits and sends the email once they’re all done.
You don’t need to do anything else. The report is complete.
Viewing a Completed Report
Section titled “Viewing a Completed Report”After a report is completed, the report link is available on the report’s detail screen. Tap it to open the report in your browser — this is exactly what your client sees.
The report shows:
- Property name and inspection date
- Every section and question with the technician’s response, color-coded
- Notes on each question
- All photos
- The signature
The client can also download a PDF version from the same page.
Working Offline
Section titled “Working Offline”Home Watch IT Fundamentals mobile app works without a network connection. Your scheduled reports, property information, and templates are synced to your phone ahead of time.
During an inspection with no connection:
- All your answers, notes, and actions are saved to your phone.
- Photos are queued for upload.
When your connection is restored, everything syncs automatically. The report email is not sent until all photos have uploaded successfully, so the client always receives the complete report.
Tip: Before heading to a remote property, open the app while on Wi-Fi to make sure everything is synced.
Frequently Asked Questions
Section titled “Frequently Asked Questions”Can I go back and change an answer? Yes. Tap any question and tap a different response. Answers can be changed any time before you tap Complete Report. Some answers can be changed after completion by editing the same report. The photos I took aren’t showing in the client’s report. Photos upload in the background. If you were offline during the inspection, they may still be uploading. The email to the client is held until all photos are done, so nothing will be missing. If photos seem stuck, check your connection and open the app to let the sync run. Can I annotate a photo after it has already uploaded? Yes. You can annotate any photo at any time before the report is completed. When you save an annotation, the photo is re-uploaded automatically with your markups included. I annotated a photo but the thumbnail still looks like the original. The thumbnail updates once the re-upload finishes. If you’re on a slow connection it may take a moment — the report will always include the annotated version. Can I complete a report if I skipped required questions? No. Required questions must be answered before the Complete Report button becomes active. The section tabs show which sections still have unanswered required questions. The client says they didn’t receive the email. Check that the email address on the client record is correct. You can resend the report from the app.