Generating Invoices
You can generate invoices at any time, but the most common would be at the end of the month for all charges the previous month.
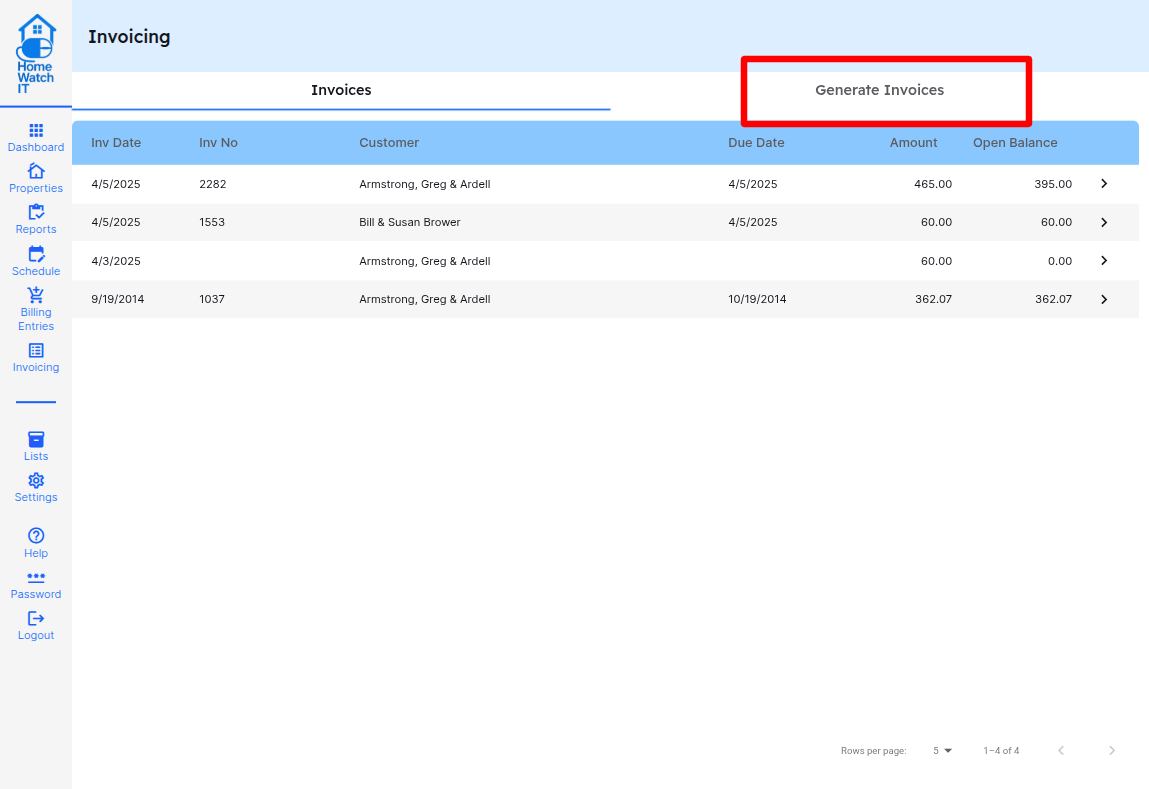
To generate invoices, go to Invoicing, and then click on the Generate Invoices tab on the screen.
You’ll see a list of the billable customers on the left, with totals of all billable entries available for them, and the right side is where you will generate the invoices.
If you need to edit the Billable Items, go back to the Billable Items list and make your edits there as required.
Otherwise, to generate the invoices, select the customers you wish to invoice in the column on the left, and enter in a Cutoff Date. Any billable items dates prior to the cutoff date will be included in the invoice; anything dated after the cutoff date will not be included and will remain in an unbilled status for your next invoice.
Enter in the Invoice Date you want to use, and then click Generate. All invoices will be created and immediately sync to your accounting software. They will also be available on the Invoice List that you first see when coming into the Invoicing Screen.
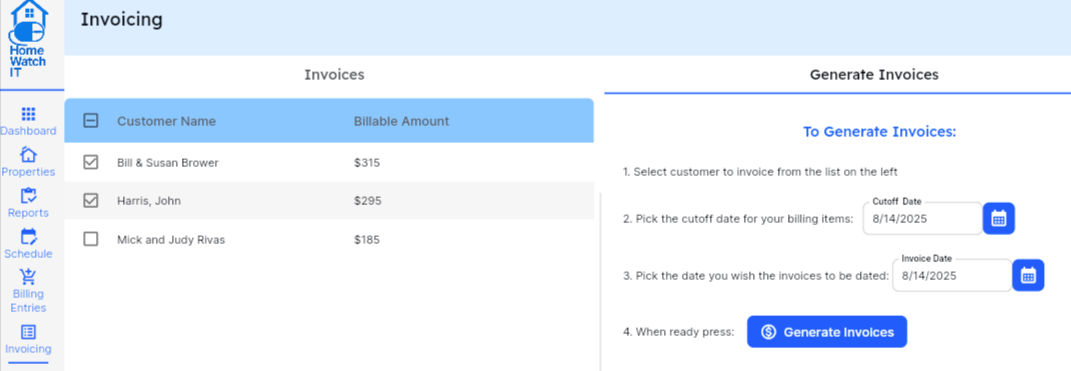
In the above example we are generating invoices for the Browsers and for Harris. We want to include Billable Items dated prior to August 14, 2025 The date of the invoice will be August 14, 2025. Then just press Generate to complete the process.
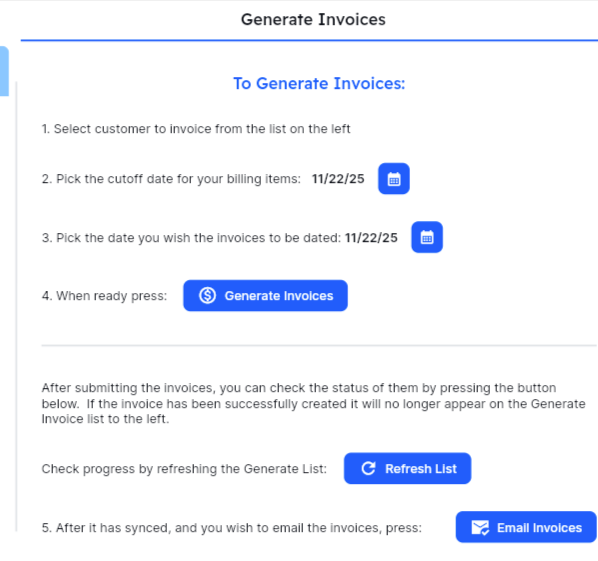
After submitting the invoice batch for generation, you can check the status/progress of this by clicking the Refresh List button. As the billing items get invoiced they will be removed from the list on the left side of the screen. You can refresh as necessary to keep checking the status.
Once all of the invoices have been generated, you can email them directly from this screen as well. Simple press the “Email Invoices” button, and all invoices dated on the Invoice Date entered above will be emailed. The email itself is sent from your accounting system — HWIT basically sends the instructions to your accounting system to email the invoice, so the email template and formats, as well as the Pay Now button, all retain the same formatting and text as you have set up in your accounting system. If an invoice has already been emailed, it will not be emailed again. Should you need to send it again you can do so from your accounting system.
Payment Info will default to whatever you have configured in your accounting system. In the case of Zoho — if you have Stripe as your payment provider it will be turned on automatically.
You may review the Invoice List prior to sending the invoices, or even edit the invoices in your accounting system prior to sending/emailing. Simply come back to this screen and make sure that the Invoice Date matches the invoices you wish to send prior to pressing the Email Invoices button.
Some important notes for QuickBooks Users:
Section titled “Some important notes for QuickBooks Users:”1-You MUST have a Terms Code selected for the customer in HWIT or the invoice will not generate and will not sync to QuickBooks. If it looks like an invoice is not getting created, check to make sure you have set up a Terms code for the customer.
2-Make sure that in QB you go to your Settings, then Sales Settings, and turn OFF Custom Transaction Numbers and turn ON Service Dates. If you do not turn off the Custom Transaction Numbers setting your invoices will not receive an invoice number from QB.