
Using Billing Entries
Billing Entries allow you to accumulate charges for the each customer throughout the month. When you reach your billing date, for example the end of the month, you should have a collection of Billing Entries that can be turned into an invoice.
Billing entries are created in three different ways:
1-Automatically generated each time you complete a report (please see the Introduction to Invoicing article for more information)
2-Manually entering an item through either the desktop app or the mobile app
3-On a regular recurring basis from the app.
You can view the collection of open Billing Entries at any time:
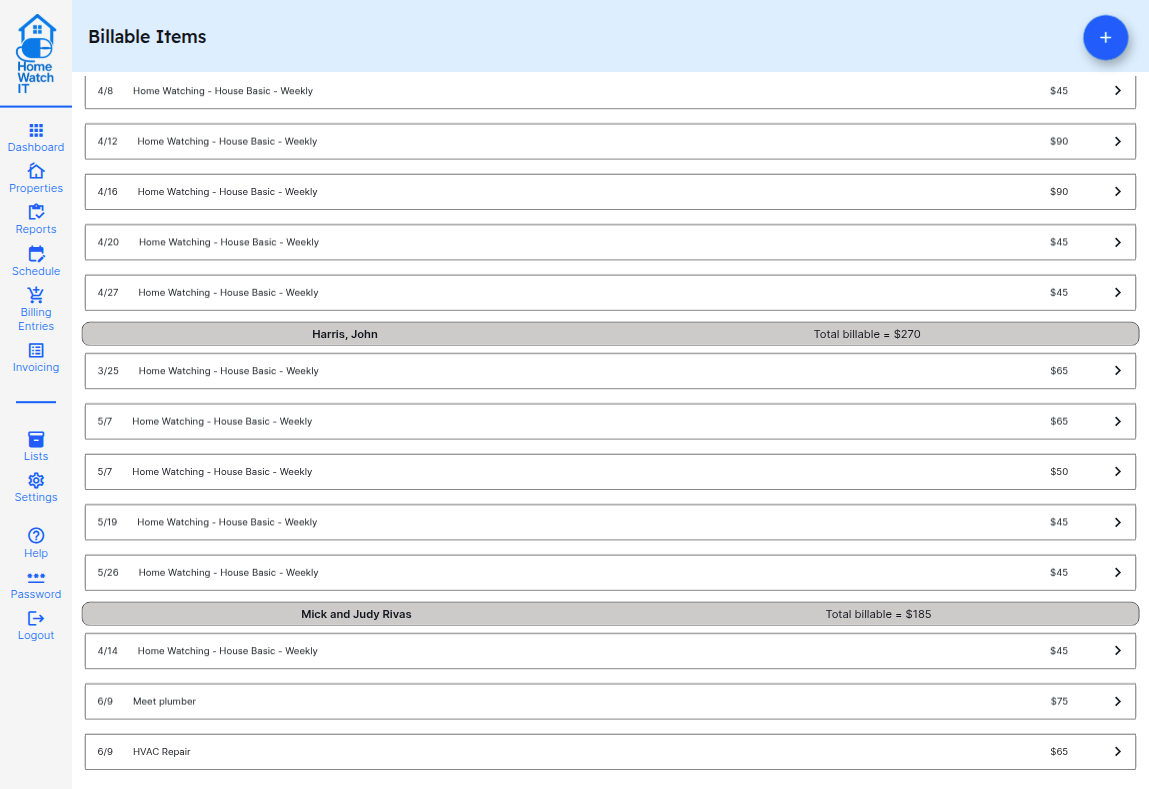
You can also click on any of the entries to edit it, change quantities (like number of hours), etc. until you have an accurate list of entries.
You can have entries for each home visit, for concierge hours, for miscellaneous charges (like batteries, filters, etc), or anything you wish to bill for.
Click the + icon to enter in a new charge and fill in the fields as necessary. Note that date and item are mandatory (of course so is customer and price!).
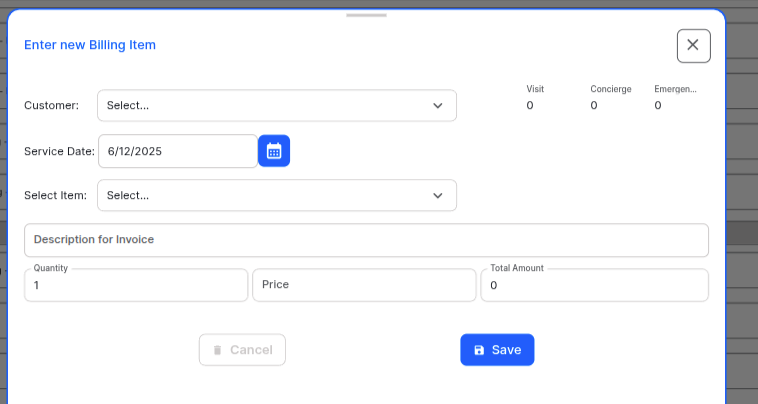
If you wish to add charges to your customers each month (or week), on a regular basis, and those charges are not necessarily tied to a report, use the Recurring Billable Items screen. An example of a recurring item, which is not part of a report, would be monthly service or membership fees.
Recurring items can be added on a monthly basis (any day of the month), or on a weekly basis (any day of the week). To add Recurring Billable Item entries, select the Recurring tab at the top of the Billable Items list screen
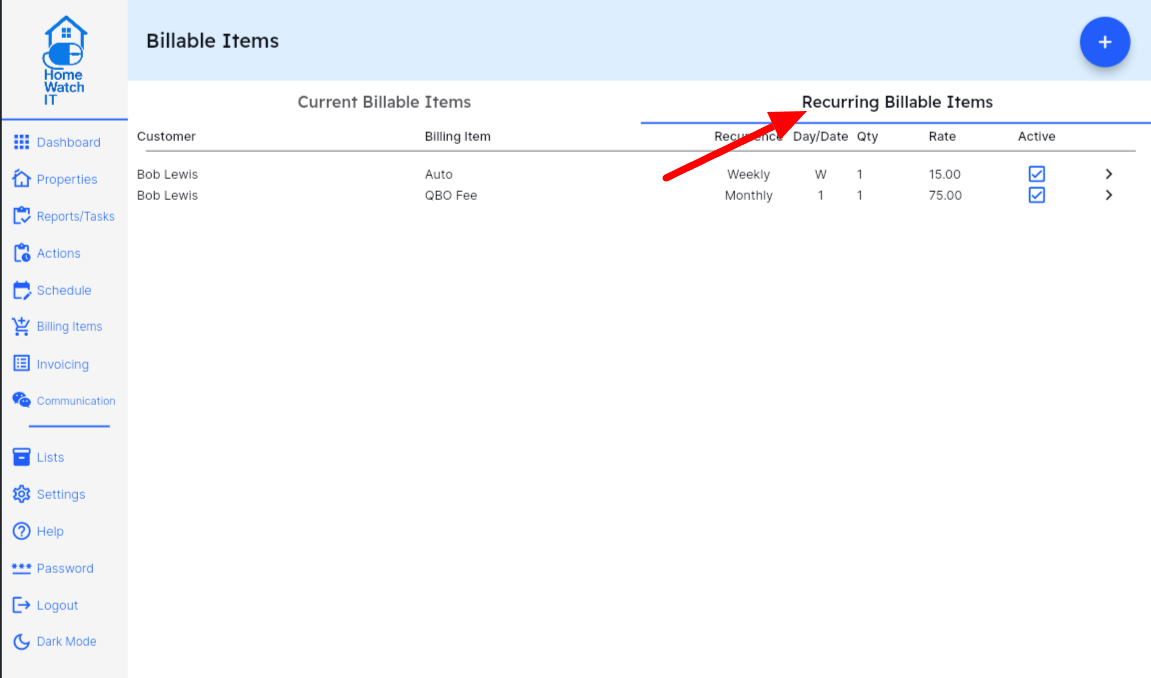
This will list all of the items already on file. Each of the items on file will be generated either (1) the 1st of the month for all monthly items, or (2) the Monday of each week for weekly items.
To add a new recurring billable item click the blue +; to edit an existing item click the > on that line. You will get the following screen:
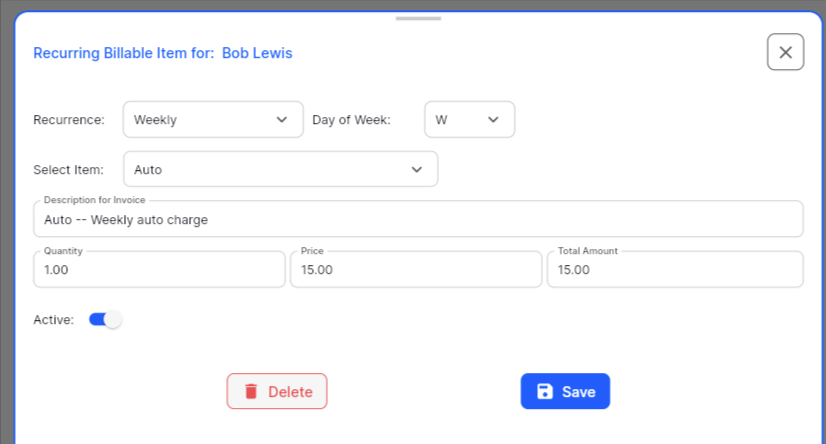
Pick the recurrence: Weekly or Monthly, and the Date/Day to make the entry.
Select your item/service/billing code, and update the description if desired. Note that what is in the description is what will flow directly to the invoice once created.
Enter the quantity and rate and click Save.
Note that you can also make entries Active or Not if you wish to turn them on/off during various parts of the year.
Once entered, all active items will be automatically added to your existing Billable Items list based on the schedule described above.
Monthly Fixed Billing
Section titled “Monthly Fixed Billing”If you prefer a fixed monthly charge over billing for individual home visits, use the Recurring Billing feature. To prevent double-billing, ensure the billing information fields are left blank on both the Schedule and Customer records. If the system does not find a specific billing item or rate on a visit, it will skip the individual charge, leaving only your recurring monthly invoice to be processed.
Pro Tip: You can suppress per-visit invoicing by leaving the billing fields blank on the customer and schedule levels. This allows you to use Recurring Billing for a steady monthly rate without the system generating extra charges for every visit. If you would like the visit dates itemized on the invoice, go ahead and pick an item id on the schedule and put in a rate of zero.