
Sending Emails From Your Own Domain
By default your report emails and customer email are sent from “[email protected]”, and the reply-to address is set to whatever email address you have on your Settings Screen under Report Options. If you have your own custom domain, and wish for the reports to show your email address instead of the homewatchit.report address, you can set up that integration on the Settings Screen.
Note that your “Reply-To” email address must be from the domain you are registering.
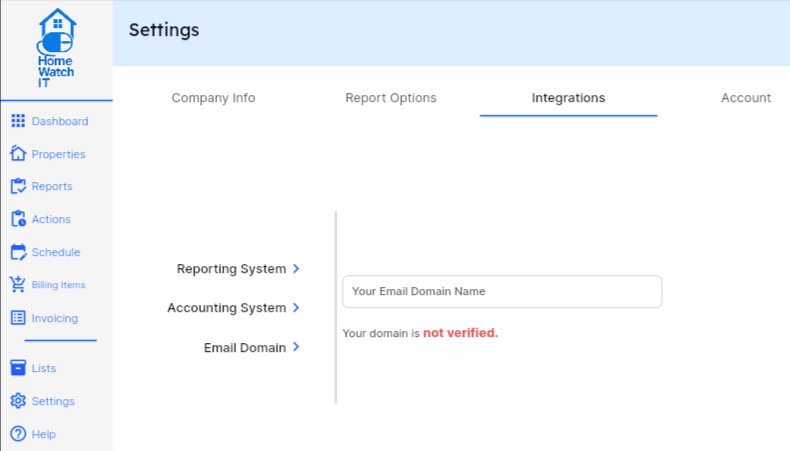
Go to the Settings Screen and select Integrations at the top. Then select Email Domain in the center of the screen. Your screen should look like the above screen. Enter your domain into the text box, and once entered a Save button will appear. (You might have to click outside of the text box to accept the domain).
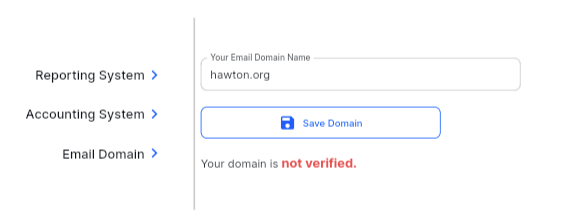
Click on Save Domain. The system will process for about 10 seconds or so, and will then move the screen forward to the Verify Domain button/step, like in this screenshot:
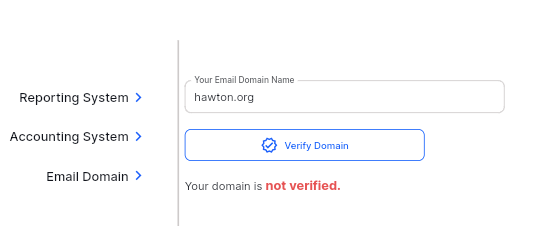
At this point you will receive an email with your DNS Settings in it. You will need to update your DNS settings with whatever company you have registered your domain. In this example the domain is registered with GoDaddy. If you have a different registrar you will need to follow their instructions, but it will be similar.
Once you are in the DNS section of your domain, add the 3 records that are contained in the email sent. Make sure that you enter everything exactly as shown in the email. (Go Daddy pick your domain and then go to Manage My Product. Then select DNS, and Add New Record).
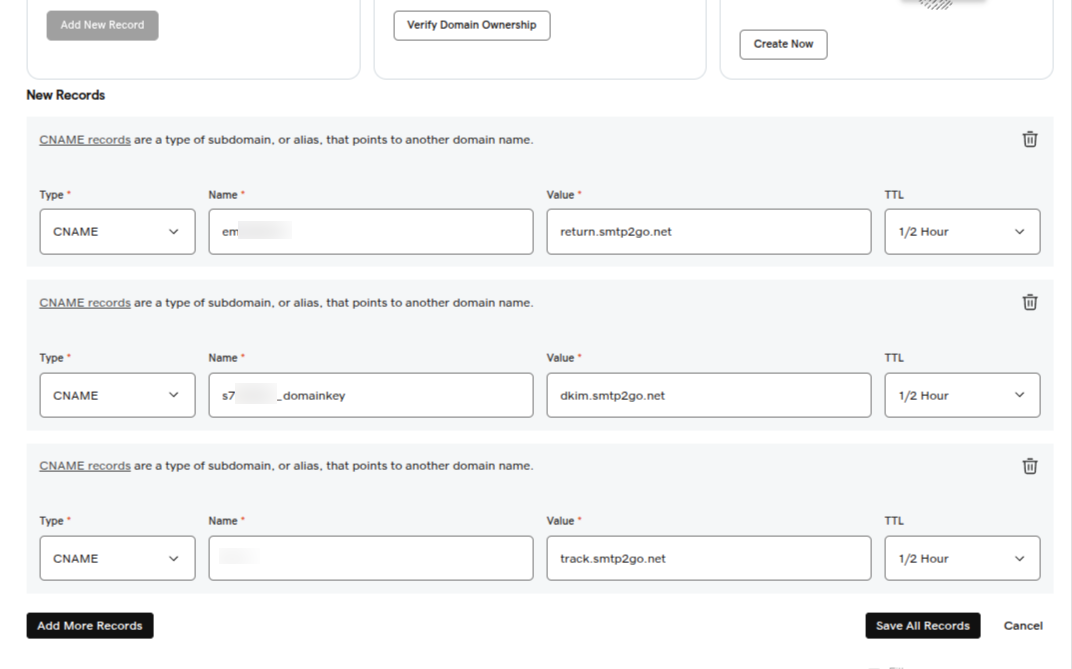
Once you have saved the DNS records — wait about 5 minutes and then return to HWIT and press the Verify Domain button. If the button disappears your domain is fully verified (don’t worry if the red message still shows — it will go away eventually).
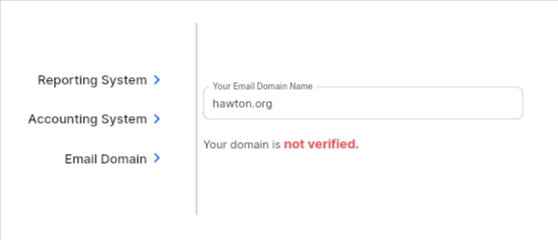
At this point you are fully verified and emails will show that they are coming from your email address instead of the homewatchit.report address.
Please note that it is strongly recommended that you add a DMARC record at this time — some providers will drop, or mark your email as spam, if you do not have a complete DMARC record in your DNS. Details are below — it is more technical and it is recommended that you work with your IT person to set up the DMARC properly.
Add a DMARC record
Section titled “Add a DMARC record”What is DMARC and how does it work? Domain-based Message Authentication Reporting and Conformance (DMARC) is an email security standard that leverages SPF and DKIM checks to perform a more advanced validation on emails received. Its purpose is to provide better email security and protect domains from being used by unknown or untrusted sources, such as cybercriminals attempting phishing or spoofing attacks.
DMARC checks against SPF and DKIM, and if there is a misalignment between those, the DMARC record directs the recipient servers on what to do with the email based on the policy set within the DMARC record e.g. quarantine or reject. Domain owners can choose to receive reports of failures so they can then take action to ensure only trusted senders can send on behalf of the domain. Overall, it helps to protect your reputation and keep recipients safe.
What is required for DMARC when sending via HWIT? It’s important to note that DMARC is not handled by HWIT directly and is a separate TXT record you need to add to the domain’s DNS settings. You can set up DMARC for your domain yourself or you can take advantage of the many DMARC providers available such as PowerDMARC.
DMARC is set by adding a TXT record to the domain’s DNS settings.
The TXT record’s hostname will be “_DMARC” (your hosting provider will typically append the domain or subdomain after that e.g. “_DMARC.example.com” otherwise you may need to include that).
The value you enter for the TXT record is the DMARC record you created/generated and will define the policies for recipient servers to adhere to. If you need assistance adding the record to your domain’s DNS settings, we recommend you contact your DNS provider’s support team.
You can use a very basic DMARC by following this format:
v=DMARC1; p=none; rua=mailto:[email protected]; ruf=mailto:[email protected];
or, you can follow this guide to create something more strict: DMARC - Secure Your Domain