Customer Property Screen
The Customer Property Screen is the one place where everything related to a particular property is located. Start by selecting Properties from your menu to see a list of all of the Properties in your company file.
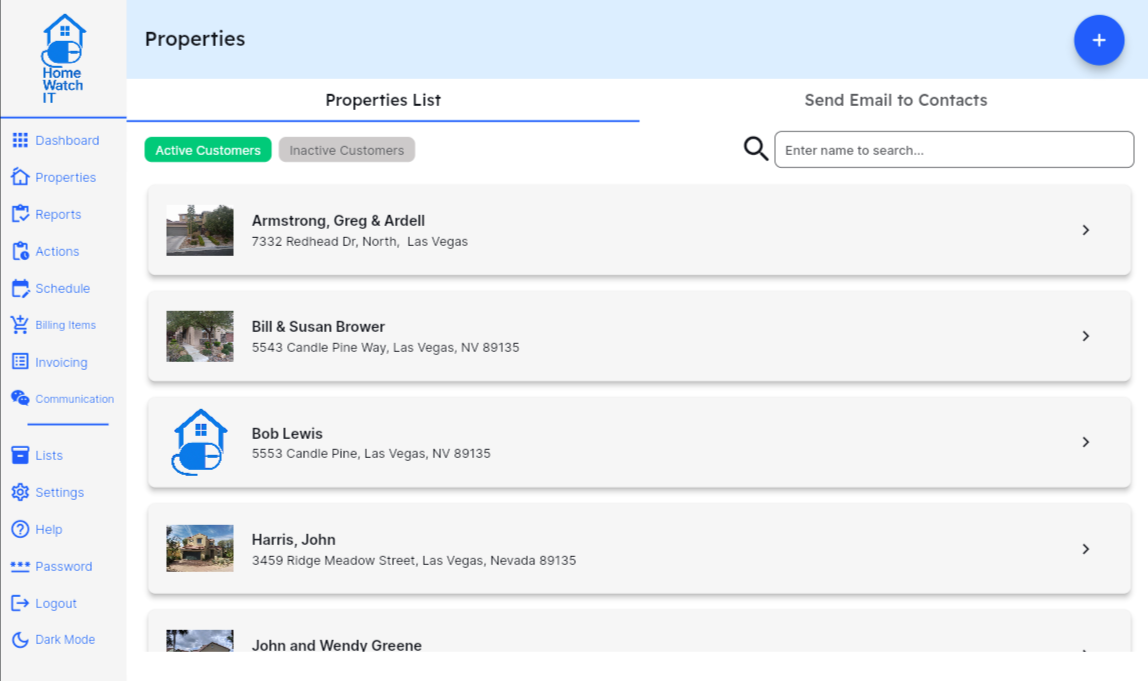
To add a new property, click on the Plus sign button on the bottom of the Properties screen. To edit an existing property, click the > on the line of the property you wish to edit.
When adding a new property, first fill in the basic information (name, primary contact, and address) and hit Add — you’ll then be taken to the full edit screen shown below. Note that to add the address click the “Lookup Address” button and a Google search bar will appear. Use that to lookup the customer’s exact address from the Google Maps database.
Once in the Property Screen you will notice 5 tabs across the top. We’ll cover each tab individually.
The Info Tab
Section titled “The Info Tab”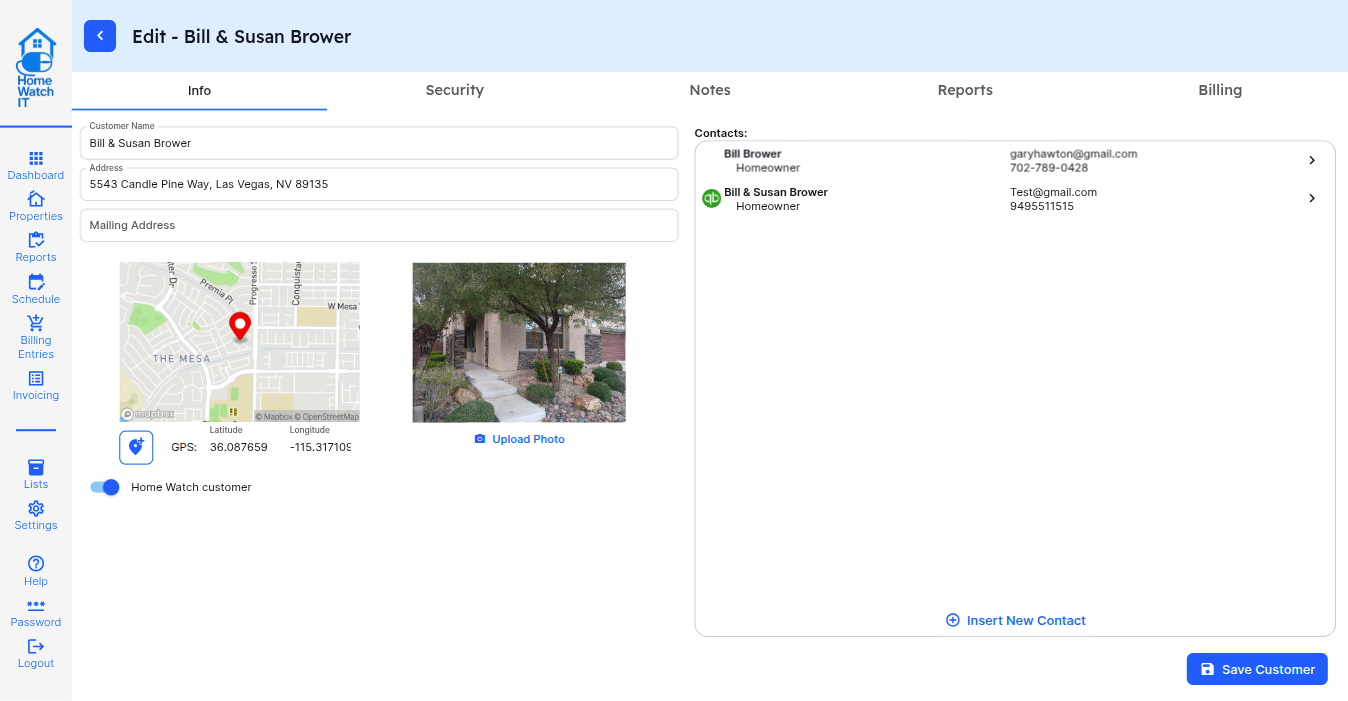
Enter in the name of the property in the Customer Name field. This doesn’t have to be the customer’s actual name, but can be a property name or identifier you wish to use throughout the system.
Enter the address as a full street, city, state, postal code address. As you start typing the address will be looked up for you and you can select any of the addresses from the lookup list to populate the address field. If you do not enter or select a valid address the customer will not be able to sync to your reporting system or show accurately on the maps, so please make sure to enter a valid address or select one from the list provided.
There is a switch called “Home Watch Customer” — which you can turn off if you would prefer that the customer does not appear on your lists within the application. Use this in the case that you might have clients from other lines of business in your accounting system, which have synced to HWIT, but you wish that they do not appear in HWIT.
You can also make a customer “Inactive” from this screen — which also marks the customer as inactive in your accounting software.
The right column of the screen is a list of all of the contacts for the property. We will cover entering and editing the contact in a moment, but first it is important to know the different types available for a contact:
- Property Contact - someone associated with the property itself. This can be an owner or a service provider.
- Receive Reports - Turn this switch on so that this contact will receive reports once completed. You can send your reports to as many different contacts for the property as needed.
- Accounting Contact - whatever information is on this contact will be what syncs to/from your accounting system for this property/customer. You can only have one accounting contact per property.
- Receive Invoices - this person will receive the invoices when generated (this is for QuickBooks only and has no impact on Zoho as Zoho managed multiple addresses in its system).
- Portal Contact - this customer will have access to the customer portal for this property. This field is not used in the current version and is for a planned future enhancement.
To edit an existing contact click the > next to the contact on the list. To enter a new contact for the Property click Insert New Contact at the bottom of the Contacts List area.
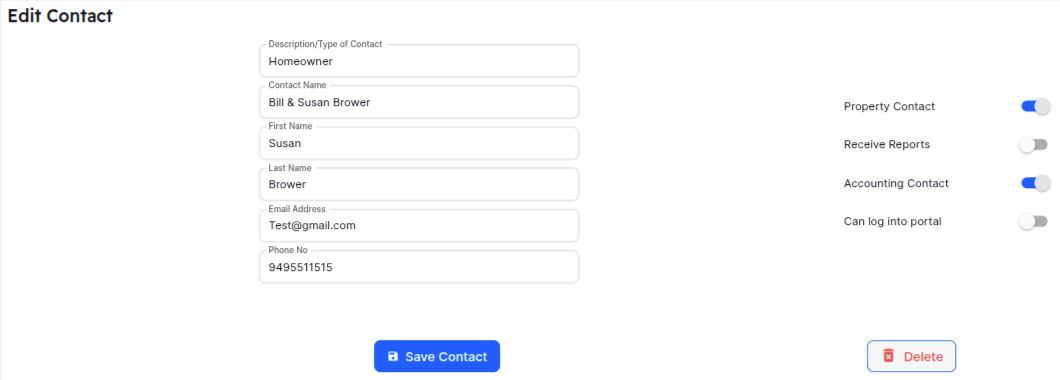
The Contacts screen will appear. Fill in all of the fields as necessary.
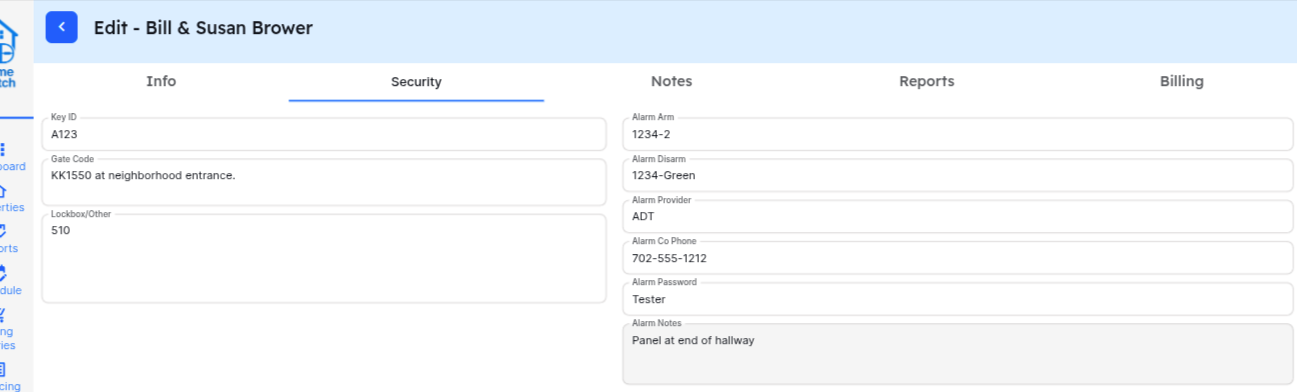
The Security Tab
Section titled “The Security Tab”Here you will enter any information related to the security and alarm of the Property.
The Notes Tab
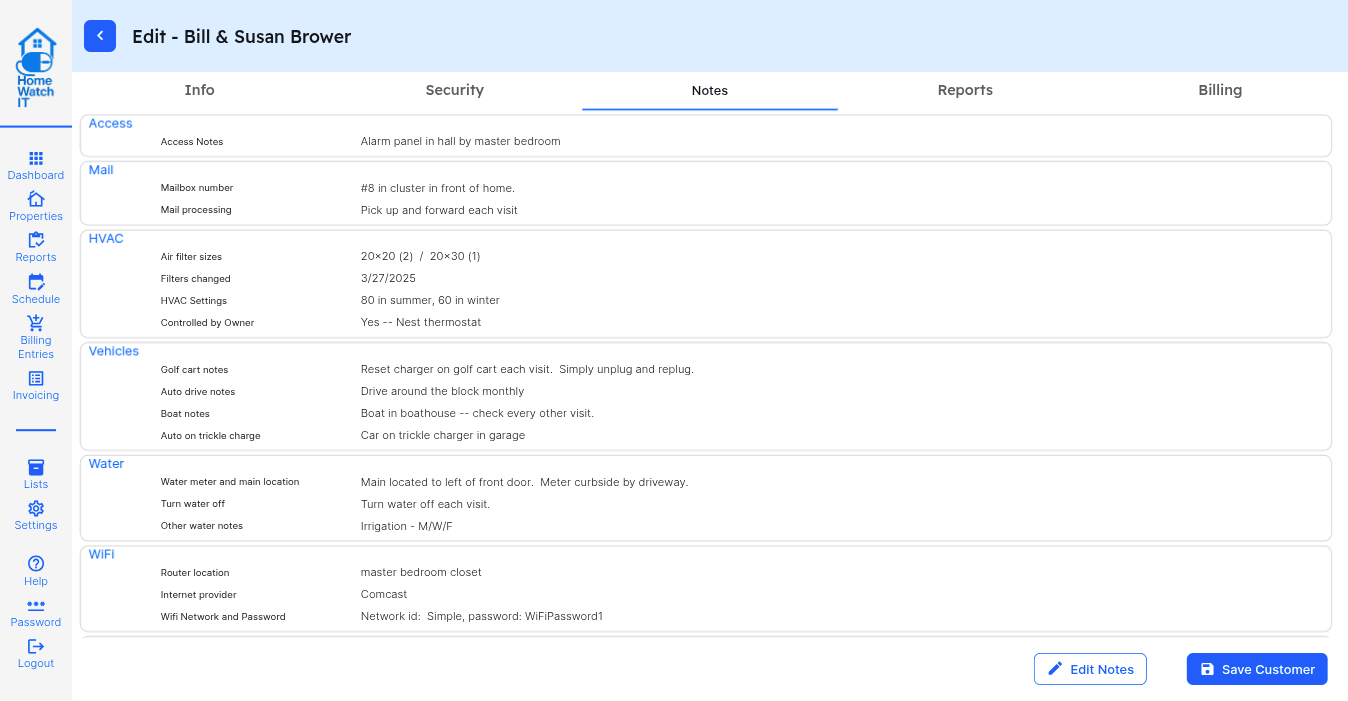
Section titled “The Notes Tab”This section will allow you to view or edit any Notes pertaining to this property. You have the option to change the order and add any notes categories or descriptions you wish — please see the Notes documentation for more information.
The Reports Tab
Section titled “The Reports Tab”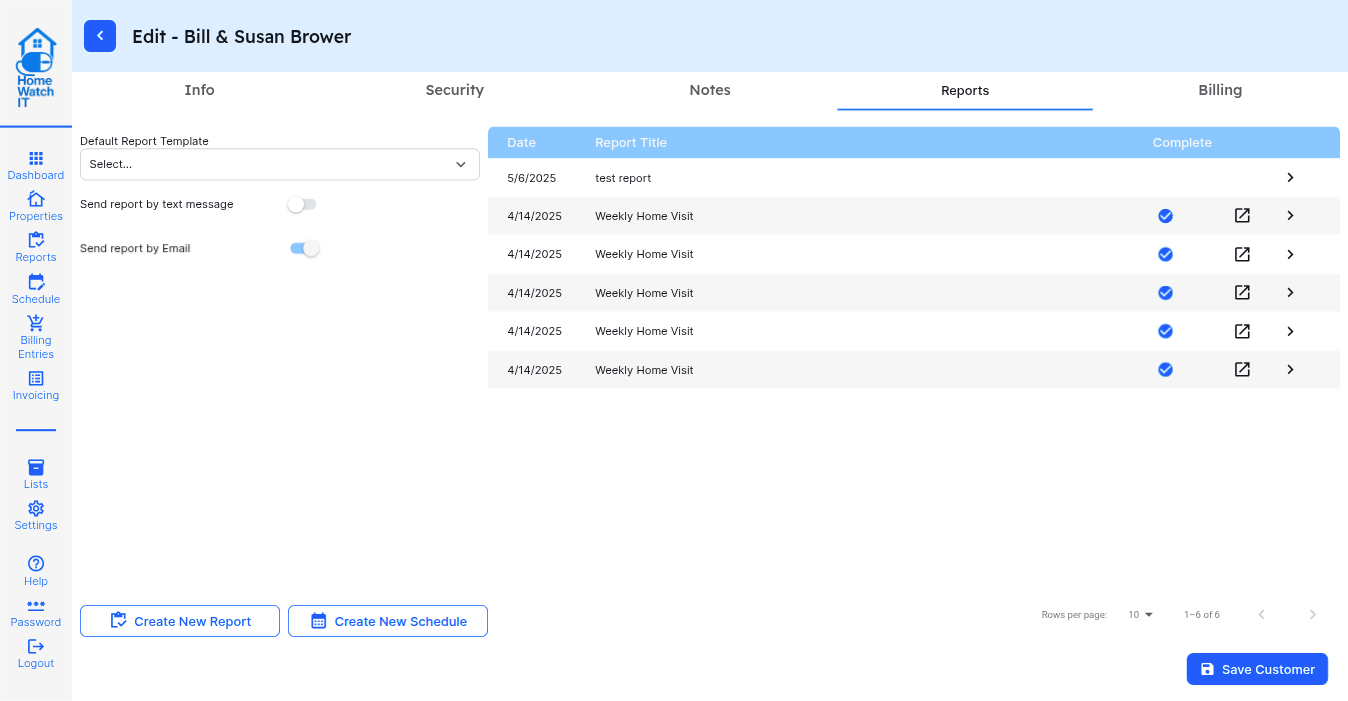
This is where you will set up anything related to Reports for this Property. Start with the Default Report Template: select the base template to use when doing a report on this property. Note that you can also set up a default report template when setting up a Schedule for the property.
There are options to send the report to the customer via email and/or text message. You will also see a history of reports listed.
Note that reports are only Auto-Emailed if you turn on the Auto-Email setting on your company Settings screen.
The Billing Tab
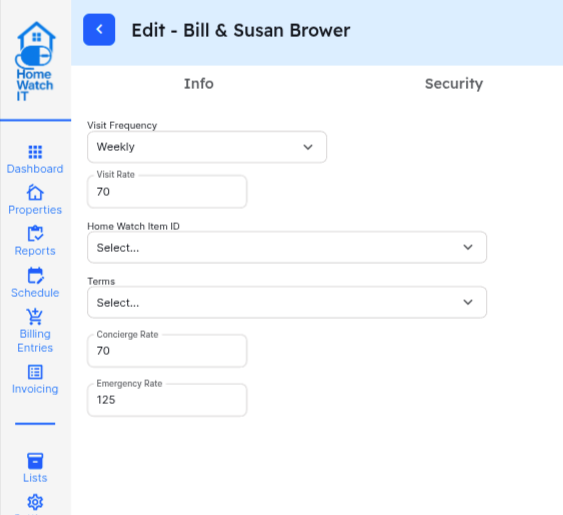
Section titled “The Billing Tab”You can set up basic billing information about the property here — such as the frequency, rates, item ID to use, and the accounting terms. These are covered in more detail in the Invoicing Documentation.
Other things to note:
- Once a Property or Customer is entered it cannot be deleted, it can only be made inactive. This is due to rules from the accounting software and to be able to retain the historical reports, invoices, etc. for that customer. If you feel you want to COMPLETELY remove the customer from HWIT send an email to support. We will evaluate if it is possible, depending on the accounting rules in place.
- If you try to do a “hard refresh” (meaning you used the refresh button on your browser) while on the Customer Edit screen, you may encounter a grey screen. This happens when the refresh occurs in the middle of working on the customer. You need to enter the customer screen with valid record to reestablish the data. Click on Properties to go back to the Property List and select the customer again.