Integrating your Accounting System
Your HWIT system will initially come without any integration to accounting active. If you wish to activate the integration you can easily do so from the Settings screen.
Before you link the systems and if you have data in BOTH HWIT and your accounting system, make sure that any existing customers’ names in your accounting system exactly matches the name in HWIT — otherwise you could end up with duplicate customers.
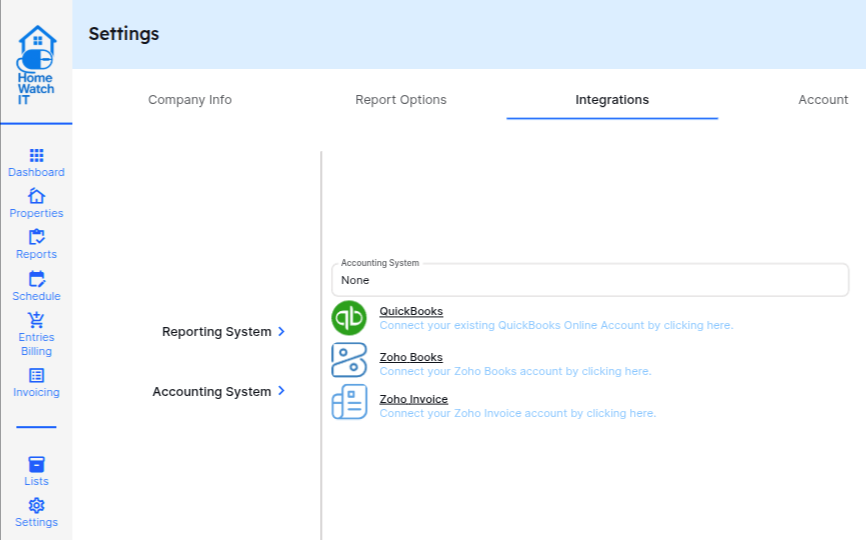
In the Settings Screen, click on the Integrations tab, and then select Accounting System. You will see your options listed along with a link to click in order to perform the linking of your system.
It is important that you select the proper system when performing the linking. Please be especially careful to select Zoho Books OR Zoho Invoice to match the system you have.
Once you click this link you will be taken to another screen to log into your accounting system. Once you have succesfully done so, HWIT will begin to sync your customers, items, etc. between the systems.
If you plan to use Vendor Bills
Section titled “If you plan to use Vendor Bills”Once QuickBooks Online or Zoho Books is linked, vendor bills you record in Home Watch IT are posted into your books. Before the first one can post, the office has one extra one-time step: make at least one item purchasable in your accounting system (in QuickBooks, tick “I purchase this product/service from a vendor” on the item), wait for the sync, then choose it as the Default expense item in Settings. Until that is done, every vendor bill saves normally but shows Blocked with the message “No expense item is set”. The full steps are in Before your first bill.